
Many serious photographers I’ve spoken to are keen about acquiring the right gear, finding the right locations and subjects and post processing their files, but don’t have very developed ideas about what to do with the thousands of digital photos they shoot much beyond hanging a couple on the wall or sticking them on social media.
Never has it been so easy to make photos, leaving us with the problem of what to do with them. It seems a conundrum. Occasionally, I review my old files and find myself amazed to rediscover decent images I had forgotten about. The reality is most hobby photographers’ digital libraries grow so large that even well-managed collections grow vague in our forgetful minds and there are likely long-forgotten, never to be seen gems lurking in those collections.
It’s such a shame to let them go to waste unseen and unappreciated, even if only by ourselves. If we can’t find a practical way to output them, they will eventually be doomed to the delete *.* key of oblivion. Wouldn’t it be nice if we had a range of practical output options beyond the likes of Instagram for enjoying our images?
In this article I share some of my thinking and ideas about simple ways to display our work – even if we restrict the audience to one, or to family, friends and house guests.
Digital
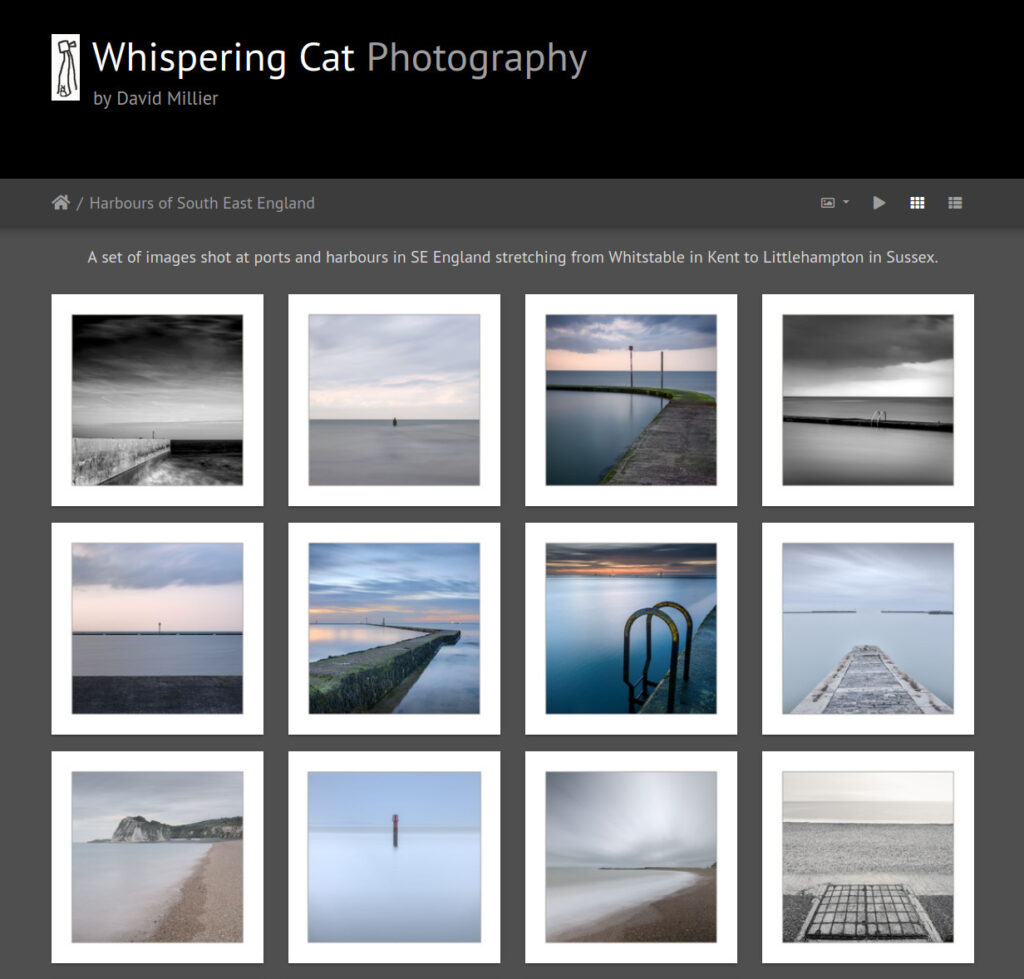
1. Create your own website galleries, organise them by place, time, theme or genre and continually update them with your best work.
2. Work in well defined, narrow projects, and develop fixed portfolios of your projects you can publish on your website
3. Use social media and file-sharing platforms sparingly for publishing and advertising examples of your pictures that link back to your galleries
4. Publish a “photo of the day” on your website. It doesn’t have to be one of those “I’ll shoot an image every single day” exercises that some people like to challenge themselves with. Just pick a photo from your back catalogue or recent shoot and publish every day.
Hardcopy
It’s hardcopy output that I consider to the “real” purpose of photography. There’s nothing quite like a well-presented physical artefact at the end to make photography seem like a worthwhile endeavour.
Traditionally, hardcopy for many people means a mounted and framed print hanging on your living room wall or even in a public gallery. But for most of us practicality intervenes. There isn’t enough wall space and gallery exhibitions are too expensive to be a realistic output for most of our work. Even if you love the idea of mounted and framed prints of your work, most of us quickly run into the obstacle of the sheer number of pictures we produce and the impracticability of framing and hanging them all. I have a few suggestions that might be useful in dealing with this problem:
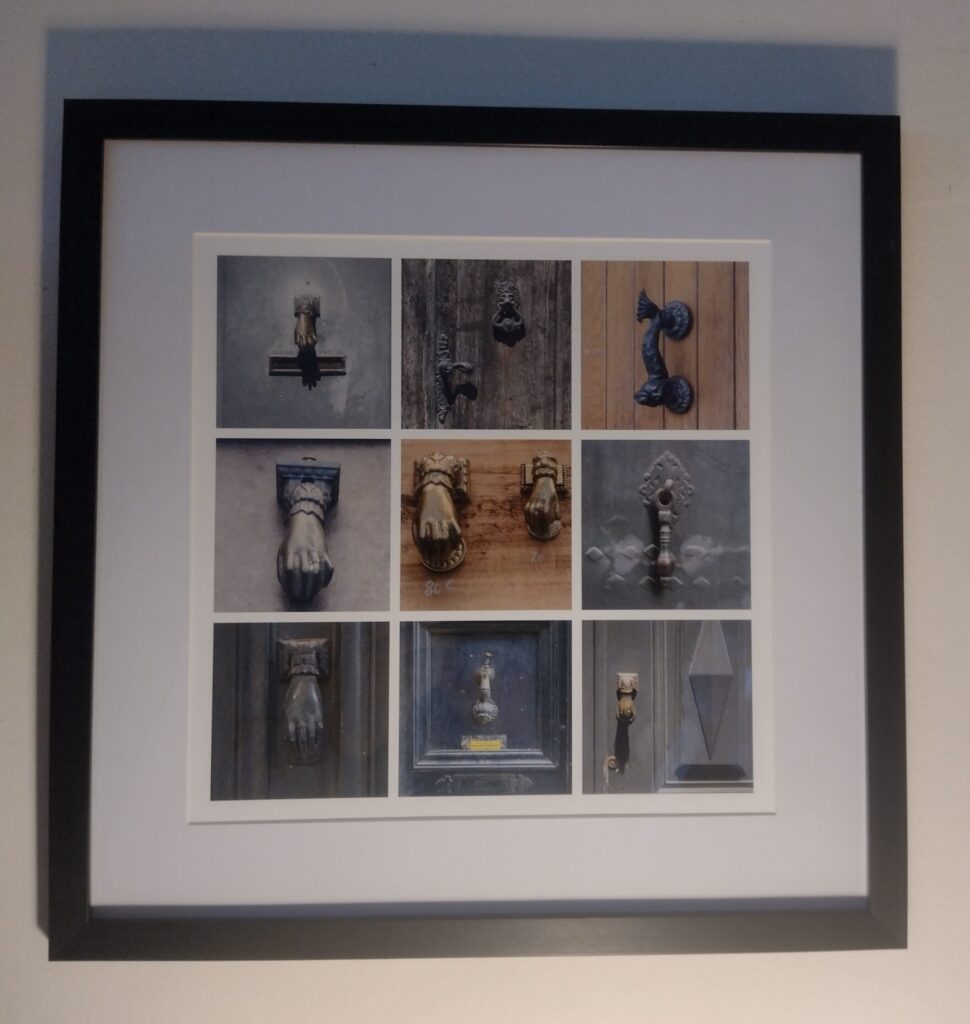
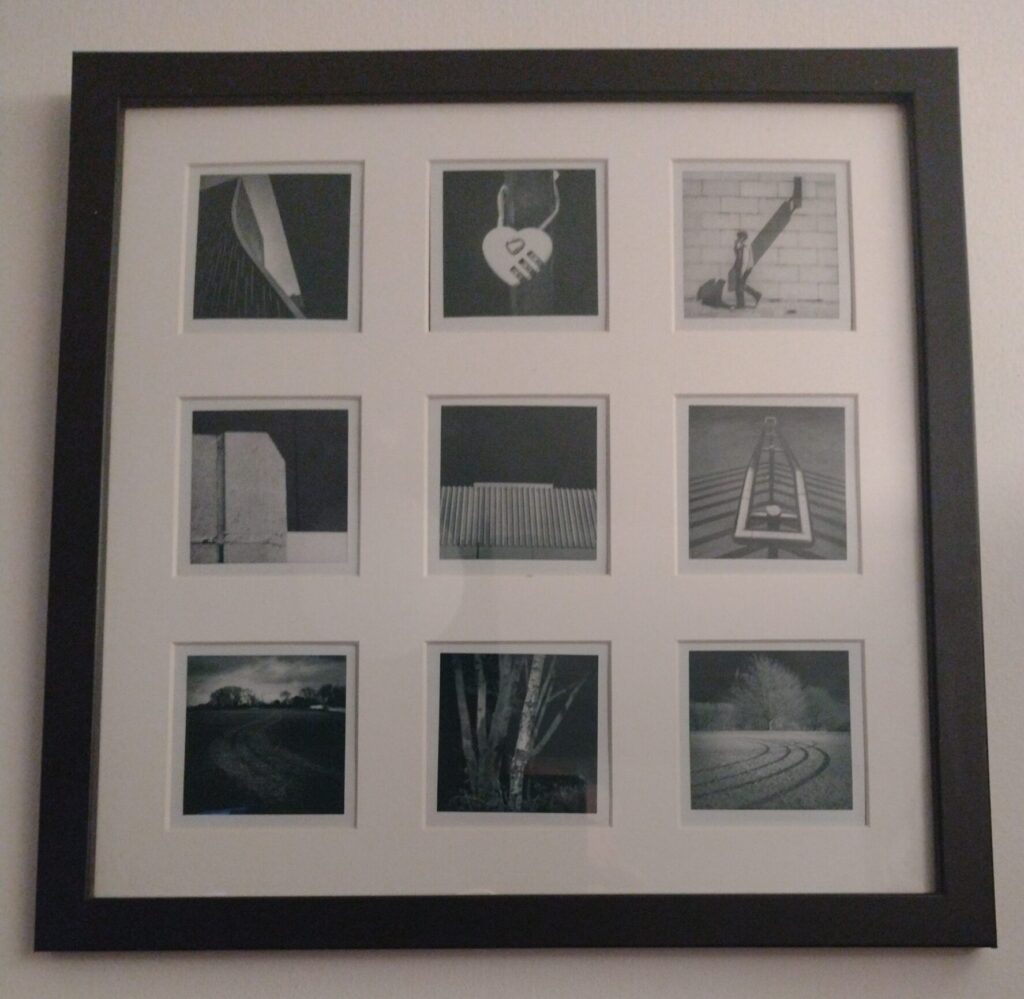
1 Grids of multiple small photos mounted and framed in a single frame.
I’ve settled on 16″ square frames for holding 12″ square mounted pictures as a reasonable compromise between image size and the room sizes and wall space in my modestly proportioned house. Using this image size, I’ve found it is practicable to fit a 3 x 3 grid of roughly Polaroid sized prints in a single frame. This approach allows me to fit a whole small portfolio in a single moderately sized frame. Lightroom and similar programs make it easy to layout multiple pictures on a single print. Once mounted and framed, the individual pictures are small and require close viewing to appreciate, but a well chosen and designed portfolio grid of images can look good together and can be enjoyed as a whole from a reasonable viewing distance, or simply from the sofa. Displaying portfolios in a single frame makes it straightforward to periodically swap out a portfolio grid image for your latest one.
2 Fuji Instax prints mounted and framed in a single frame
An alternative to the inkjet print grid is to do something similar with Instax instant prints. Instax does not restrict you to using Instax cameras, you can buy moderately priced portable Instax printers that accept digital files wirelessly, so you can print images sourced from any digital camera via a phone app or even directly from some models of Fuji APS-C and medium format cameras. This approach differs slightly from the single image grid option as you will need to mount the individual plastic prints, but instant prints have their own aesthetic and I think if done well, they make attractive displays.
3. Twin pictures or triptychs mounted in a single frame
Another way to expand the number of framed pictures you can hang is to combine more than one print in a single frame. Printing 2 or 3 smaller images on a print, then mounting and displaying in a single frame can triple the number of pictures you can display, and encourage you to create mini-portfolios in this format. Once again, even if you have very few places you can hang pictures, you can still update the images periodically and increase the number of images you get to display and enjoy.
4 Personal gallery/print panels
I was inspired a little by the Royal Photographic Society Distinctions here. The RPS require you to submit a ‘panel’, as they call it, of mounted prints. You also supply a hanging plan that describes the layout format and the positioning of each print. These panels consist of 10, 15 and 20 prints, depending on the distinction level. The idea is that the panel layout itself contributes to the overall effect, creating a meta-print made up of the individual prints.
My idea is to create a modified version of the RPS panel approach using framed prints in a fixed layout. This means finding wall space in your home large enough to display, say 10 – 15 framed prints as a close-knit panel. I considered this an absurd dream in my little house until I realised I had a ready-made unused space: my stairwell. The stairwell in my house is an empty, plain-white painted wall that curves around in a U-shape as the stairs twist through 180 degrees to the upper floor. The stairwell is really a normal square space but the wall has been deliberately curved to disguise the water pipes running from the ground floor to the attic in the corners that are hidden underneath plasterboard. This makes a curved space large enough to hang a closely grouped panel of framed prints, possibly 3 rows of 3 or 4 frames. These frames can be filled with a small portfolio of prints (and swapped out periodically for new portfolios).
The pictures so placed can be enjoyed individually by anyone going up and down the stairs, or as a whole panel looking down the stairwell from the landing. I’m working on a practical hanging method at the moment that makes it easy to pull out the frames and swap out the images from time to time. Plans are afoot! I’ll write another article in due course showing the final outcome.
Identifying this unused space was an unexpected stroke of good fortune, but I’m sure with a bit of imagination, it may be possible for you to find a suitable unused space in your home. You can choose a frame size to fit the available space. Even a set of baby frames could work well.

5. Boxed portfolios of mounted prints
Given that my plan is to print and mount collections of 12″ prints in my personal gallery space, there immediately arises the question of what to do with my upcoming portfolio prints and what to do with the old ones once they are taken down.
The answer I arrived at is to store them in archival storage boxes. These are not only perfect for long term storage but can be opened up and viewed as portfolios of mounted prints in their own right. A panel of images as I described for my personal gallery are about the right number to fill one of these boxes.
I’m currently using the “Seawhite” archival box range available on Amazon UK. These are strong, linen covered, attractive black hinged clamshell boxes made from acid-free material and available in the usual European ‘A’ sizes. There are plentiful alternatives available.
The nice thing about these boxes is that not only do they look good stored on a shelf, but they open up on a table in a way that makes is easy to extract a mounted print, admire it for a bit, stack it in the other side of the box, pull out the next one and so on until you viewed them all. It keeps everything neat and tidy, makes viewing the prints feel like a special event and at the end you simply close the box and return it to the shelf.
For reasons of practicality, my plan is to use the larger size boxes to store my personal gallery candidates and the smaller A4 versions to store small mounted prints that I have printed and mounted specifically for portfolio box viewing. It’s a lot easier to handle and store smaller prints intended for close viewing and mounted and boxed, these little portfolios make attractive artefacts without ever being intended for framing. My initial experiments indicate the A4 boxes will hold 10-12 mounted prints nicely, which I think is about the right number for a small portfolio.
6. Archive boxes of loose, unmounted prints
Archive boxes can also be useful for storing loose, unmounted prints – single prints not part of a portfolio, or perhaps images you like and want to keep and look at occasionally, but don’t merit the blue riband treatment. You can store a lot of loose prints in an archive box which can encourage you to keep printing, curating and enjoying your prints. Hardcopy rules!
Another advantage of filing prints in archive boxes is that they act as more formal equivalent of the ‘attic shoebox of prints’ waiting to be discovered by your descendents and improve – slightly – the potential longevity of your work.
Note on labelling archive and portfolio boxes
My Seawhite boxes all look identical. It is essential to label them so you can easily identify and find them. I’m going to use simple adhesive clear plastic label holder and handwritten cards. I expect there are ways of making fancy gold leaf labels or similar if you want to get exotic. Let me know in the comments if you know of better labelling methods.
In the third article I will look at photo books: commercially printed and hand-made.